
Woodworking especially if you are a DIYer is all about patience. You’ll need time to learn everything even if at the beginning you strongly believe that working with wood is simple and easy. Well it is not. As soon as you’ll start thinking of making your first simple object, for example a small box, you’ll then realize that it’s more complicated than what you thought and that you’ll not be able to do what you want with a hand saw and a ruler. You’ll understand how hard is to connect two or even 3 pieces of lumber together. Then you’ll start to buy some power tool and then realize that you’ll have to spend one year building jigs to make jigs that will allow you one day to make that small simple box for a DIY gift. Someone would say that all of this is non sense. Well, to me it is priceless.
After all of this, you’ll realize that your power tools are blowing sawdust all over you workshop and you’ll not be able to breathe anymore. If this is your case the Cyclonic ShopVac is what you are looking for.
This is the list of what I used:
- cyclonic cone (two options: the dust commander or its cheaper version WeeDee, made in China)
- a shopvac: I bought a very cheap one. It’s a little bit noisy but works just fine for my purpose.
- a shopvac hose (here is an example)
- some scrap wood to build the cart
- wood glue
- a pair of casters
- fittings for your shopvac hose, for the cone and for the power tools.
- 2 paint buckets: i bought mine at my local homecenter OBI (here is the link)
- Silicone ore similar sealant
- M5 bolts, nuts and washers
The cyclonic cone

This is the core of the whole project. You might want to make a DIY version but personally I decided to go for off the shelf product because I wanted to be sure of the perfect efficiency of the suction. I will probably try to make my own version in the future in order to make it more compact but for 20€ I believe it is worth it.
How does this work? Basically your shopvac sucks air from the top pipe while the dust is coming from the pipe that is tangential to the cone. The centrifugal force and the down force are stronger than the suction force therefore the sawdust is forced to fall into the bucket that is bolted on the bottom of the cone.
In order to connect the cone to the bucket I used 4 M5 bolts and nuts with washers and some silicone as sealant.
The Bucket
Actually you’ll need to use two buckets and one cap. You want to use two buckets so that one of them can be fastened to the shopvac cart and the other can be packed on the top of it. By doing so you’ll be able to easily remove the bucket full of sawdust in order to empty it.
I purchased my two buckets at my local OBI store for 2 bucks or less.

3D printed hose connections
You can buy them or make them. Personally I wanted to make my own for two reasons: first they are a bit expensive to buy. Second I need a lot of different sizes to fit all of my needs and applications. Therefore I designed all the models with FUSION360 and printed them out with my Creality Ender 3 Pro, and this was the first result.. when I came back from work I found this mess in the table..

Anyway after the first mistake and some other hours of printing the result is great and the fittings are perfect and I am super proud of them.
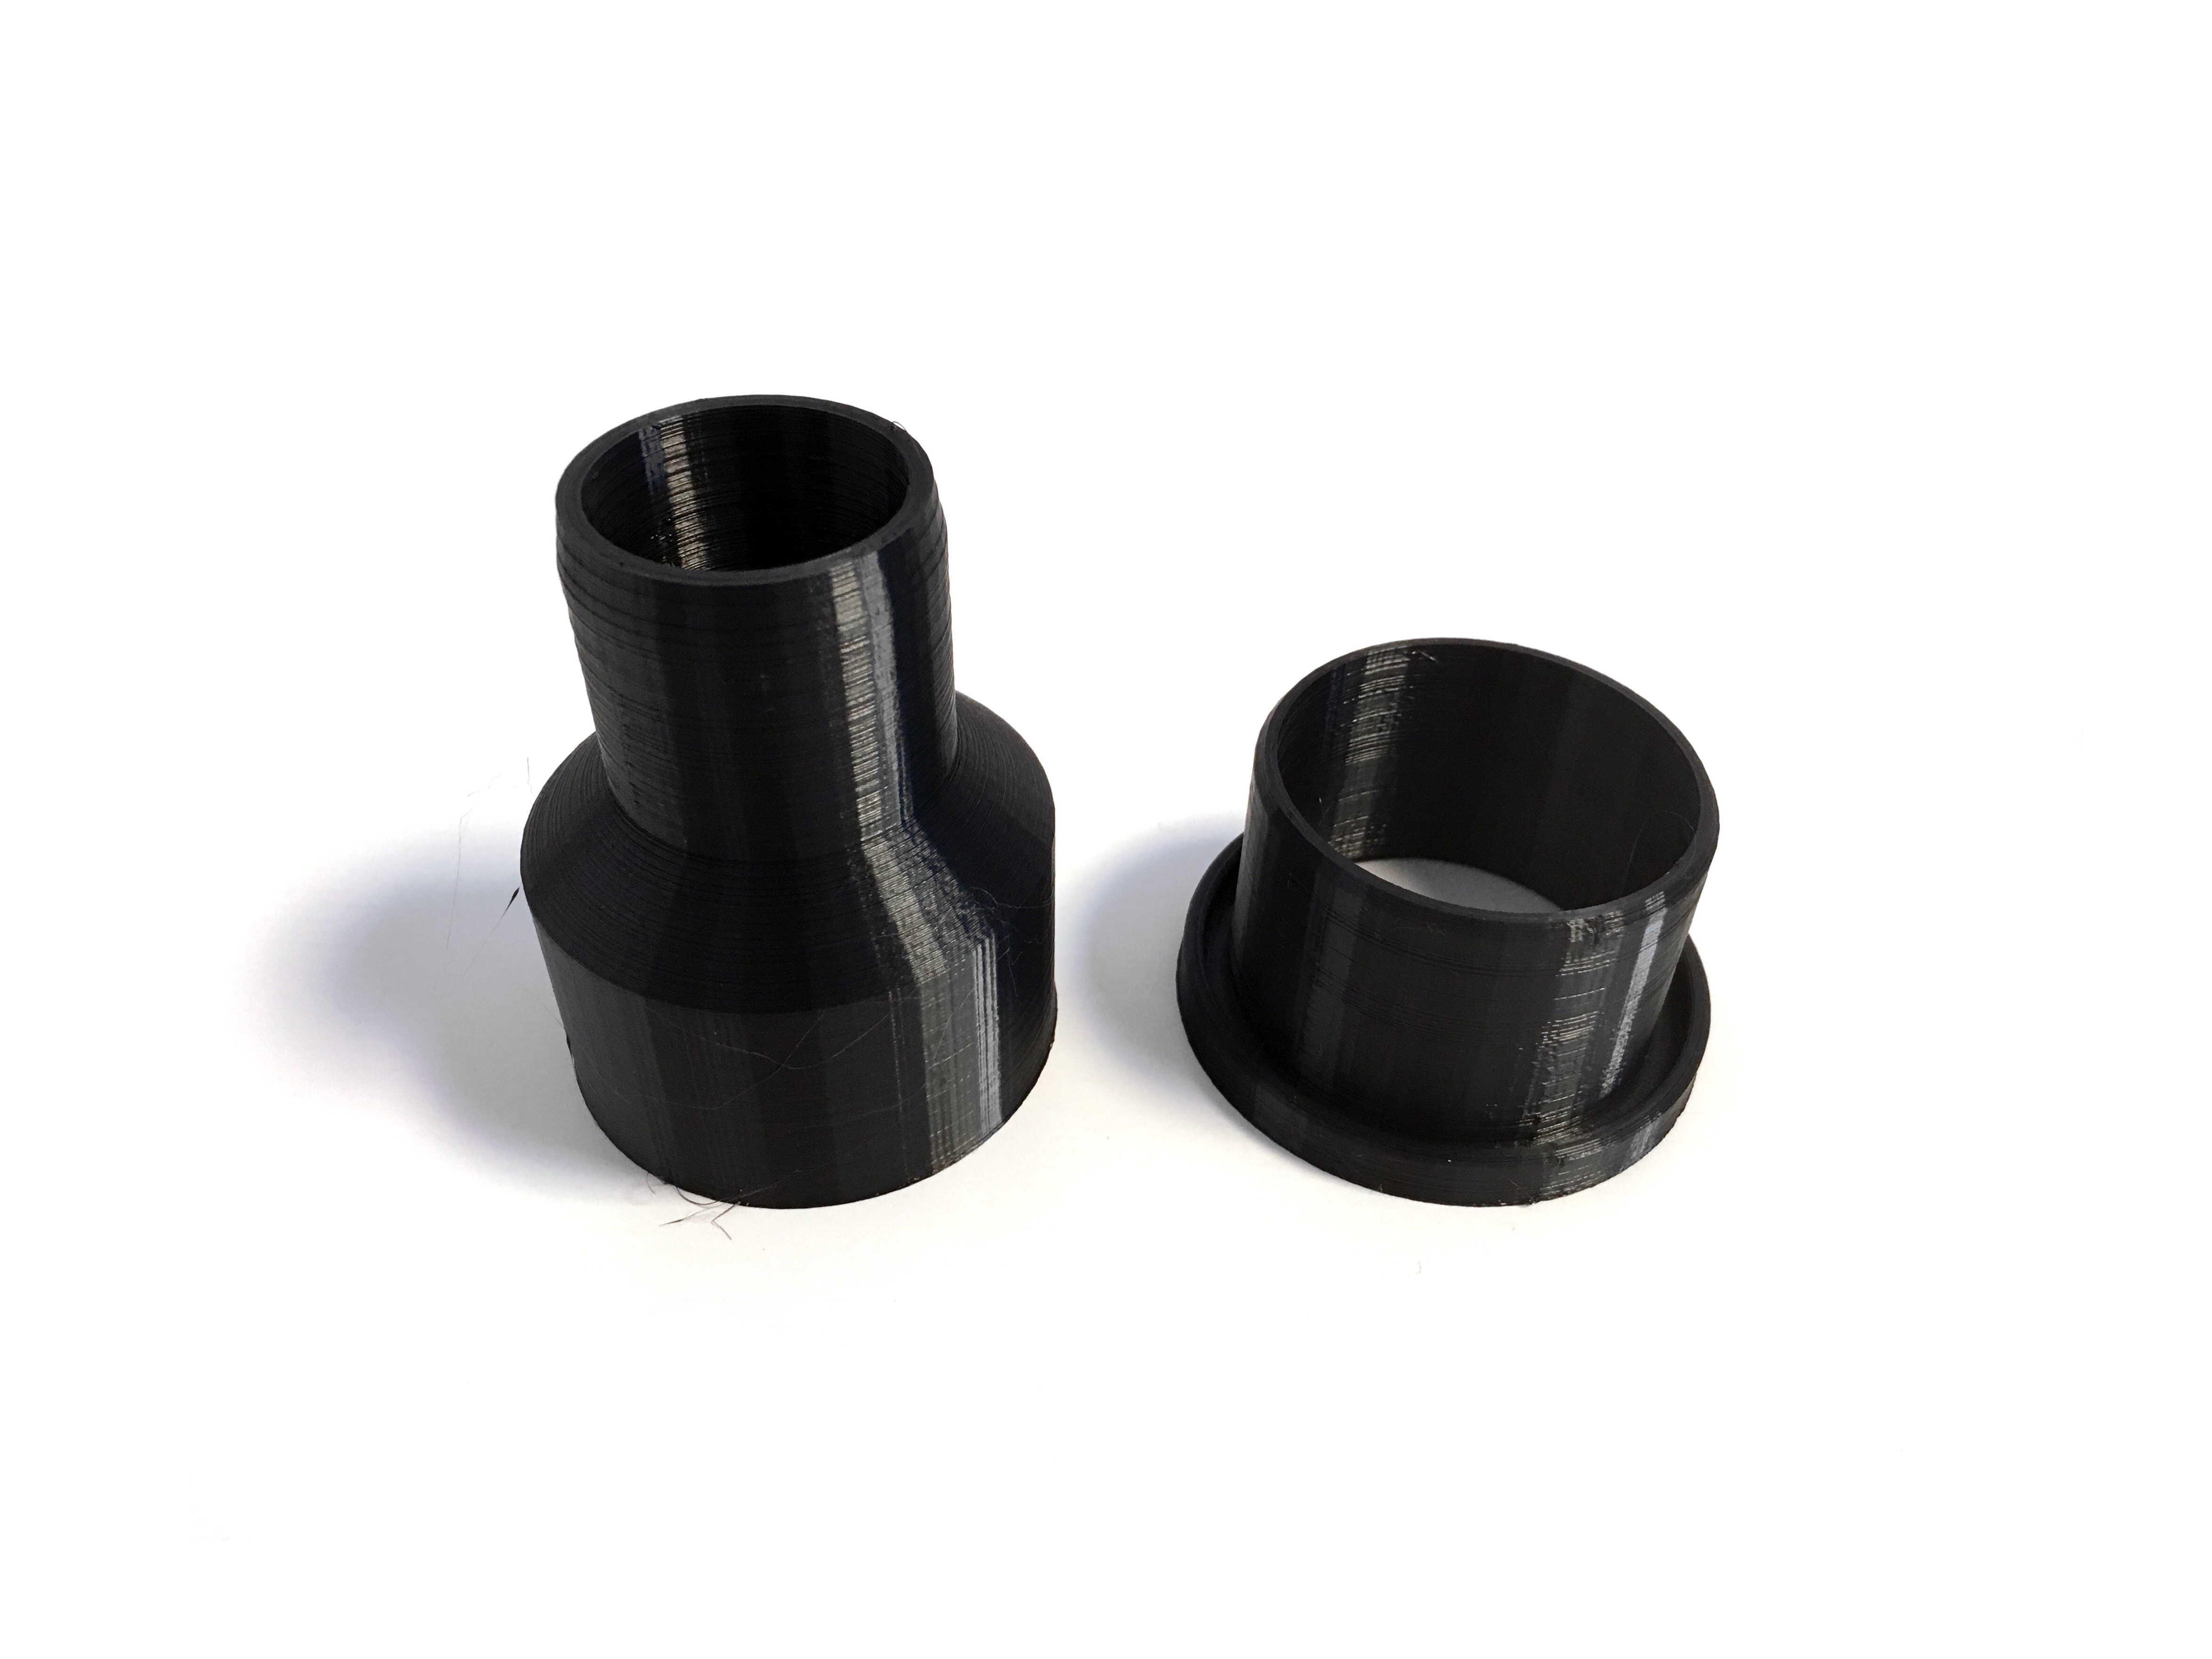
Left: output fitting. Right: top cone reduction.

If you want to use my models you can find them on Thingiverse, here.
The Cyclonic Dust Collector Cart

Well, you’ll quickly understand that all of these parts together take a lot of space in your workshop and if you need to move them from one place to another or for example you want to use it to clean you car, you need to fix it in some way and put some casters underneath: you need to build a cart!
The shopvac

When I started this project I designed it to use it with a super cheap vacuum cleaner bought at my local home center OBI. The cost of this vacuum cleaner is around 35€, here is the link. Nothing fancy at all, just a bucket, a motor, a basic foam filter and a 1.5 meter hose. I can’t say that it’s quiet but it does the job and it is super cheap. Problem is that after some time the filter gets ridiculously useless and allows all the dust to get out of the bucket itself creating then more and more chaos in my workshop. I therefore decided to upgrade it and purchase a small professional vacuum cleaner: the BOSCH GS20L for which I already posted a related article here if you want to read my review.

Useful tip: I also purchased a radio controlled power supply socket in order to be able to power on the shopvac from the other side of the worskshop, here is the link.
That’s all for now, hope you enjoyed it and talk to you soon.
Stay tuned!
Max
P.s.: For the next project I am going to build a DIY air cleaner for my workshop using a recicled cooling fan and some scrap wood (here is the link).

One Comment Add yours